×
Login Form
×
Registration
Profile Informations
Login Datas
or login
Details
Specification:
Transmitting module: 52*22mm
Receiving module: 50*20mm
Mode of use: Handheld
Pointing characteristics: Cardioid pointing
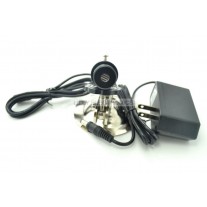
Power supply: External power supply
Microphone type: Moving coil
Applicable objects: Music instruments for recording
Speaker unit: No speaker
Channel: 1
Module selection instructions:
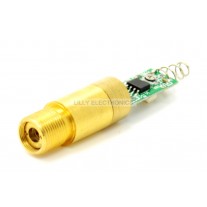
type1: transmitting module (moving coil microphone) : suitable for connecting moving coil microphone and external audio signal.
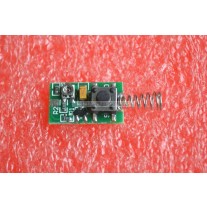
type2: Receiving module*1
type3: transmitting module module (electret) : suitable for connecting electret microphone, for common telephone application.
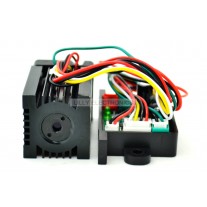
type4: LCD screen*1+transmitting module (moving coil microphone)*1+Receiving module*1
type5: transmitting module (moving coil microphone)*1+Receiving module*1
type6: LCD screen*1+transmitting module (electret)*1+Receiving module*1
type7: transmitting module (electret)*1+Receiving module*1
type8: Receiving module(with sheel)*1
Key function description:
1 Long press to turn on
2 After power on, press the button to switch a frequency point Frequency range 750--759MHZ, 760--769MHZ (default 760-769MHZ)
3. Long press to turn off
Code matching function description (LCD screen required)
Press and hold the button to turn on without releasing the button. See the screen horizontal line flashing, power on the receiver, the receiver LED flashes once, then the LED is always on.
After successful code matching, release the button, and then the screen is black. Press the button to light the screen. The receiver is on and the link is successful.
Restore the default ID: Operation method: long press the button in the shutdown state, release the button when you see the screen flashing horizontal line, and then immediately click three times, only press 3 times, wait for a while after the display, display pilot indicates that the recovery is successful ,The LCD module is used for the transmitter, and is mainly used to display channels and battery power. The LCD screen is not a necessary accessory, and the use of the LCD screen does not affect the main functions.
Two: Wiring instructions
2.1 Connect the electret microphone
The electret microphone needs to be connected with a 15cm cable to the input interface of the transmitter module, and the microphone + to the M- silkscreen on the back of the module-to the silkscreen M+ on the back of the module. If it is reversed, the noise at the receiving end will be loud.
2.2 Pickup coil microphone
The dynamic microphone can be directly connected to the input interface of the transmitter module, and the microphone + connects to the M+ silkscreen on the back of the module-connects to the silkscreen M- on the back of the module
2.3 Connect audio signal
The input audio signal can be directly wired to the input interface of the transmitting module, audio + connected to the M+ screen printed on the back of the module-connected to the silk screen M- on the back of the module
Package:
1* Wireless Audio Module
Transmitting module: 52*22mm
Receiving module: 50*20mm
Mode of use: Handheld
Pointing characteristics: Cardioid pointing
Power supply: External power supply
Microphone type: Moving coil
Applicable objects: Music instruments for recording
Speaker unit: No speaker
Channel: 1
Module selection instructions:
type1: transmitting module (moving coil microphone) : suitable for connecting moving coil microphone and external audio signal.
type2: Receiving module*1
type3: transmitting module module (electret) : suitable for connecting electret microphone, for common telephone application.
type4: LCD screen*1+transmitting module (moving coil microphone)*1+Receiving module*1
type5: transmitting module (moving coil microphone)*1+Receiving module*1
type6: LCD screen*1+transmitting module (electret)*1+Receiving module*1
type7: transmitting module (electret)*1+Receiving module*1
type8: Receiving module(with sheel)*1
Key function description:
1 Long press to turn on
2 After power on, press the button to switch a frequency point Frequency range 750--759MHZ, 760--769MHZ (default 760-769MHZ)
3. Long press to turn off
Code matching function description (LCD screen required)
Press and hold the button to turn on without releasing the button. See the screen horizontal line flashing, power on the receiver, the receiver LED flashes once, then the LED is always on.
After successful code matching, release the button, and then the screen is black. Press the button to light the screen. The receiver is on and the link is successful.
Restore the default ID: Operation method: long press the button in the shutdown state, release the button when you see the screen flashing horizontal line, and then immediately click three times, only press 3 times, wait for a while after the display, display pilot indicates that the recovery is successful ,The LCD module is used for the transmitter, and is mainly used to display channels and battery power. The LCD screen is not a necessary accessory, and the use of the LCD screen does not affect the main functions.
Two: Wiring instructions
2.1 Connect the electret microphone
The electret microphone needs to be connected with a 15cm cable to the input interface of the transmitter module, and the microphone + to the M- silkscreen on the back of the module-to the silkscreen M+ on the back of the module. If it is reversed, the noise at the receiving end will be loud.
2.2 Pickup coil microphone
The dynamic microphone can be directly connected to the input interface of the transmitter module, and the microphone + connects to the M+ silkscreen on the back of the module-connects to the silkscreen M- on the back of the module
2.3 Connect audio signal
The input audio signal can be directly wired to the input interface of the transmitting module, audio + connected to the M+ screen printed on the back of the module-connected to the silk screen M- on the back of the module
Package:
1* Wireless Audio Module
Instagram Tag
You may also be interested in the following product(s)
-
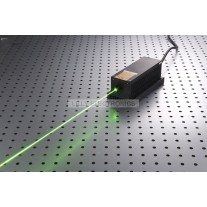
532nm 10mW Green Line Laser Diode 18*75mm Module High Quality Aviation Aluminum
Regular Price: $55.54
Special Price $49.99